
This article guides you through tips on how to troubleshoot a workflow, should the workflow not be providing expected output.
- As part of PPC Samurai best practice, we recommend looking for and excluding any account elements that are not required for the workflow, which helps to reduce the number of checks the app is required to make and also reduces the amount of time the workflow takes to run. There are a common set of exclusions that we use and you'll often see these checks at the start of global workflow templates. These are listed below and could potentially be excluding desired elements from your particular workflow.
- Status. Workflows will often be assessing only active keywords, ad groups, and/or campaigns. Hint: The status check waterfalls up the account structure tree, so if the workflow is checking for an active keyword, it is also making sure that the keyword sits in an active ad group and active campaign. The same is true for the ad group level.
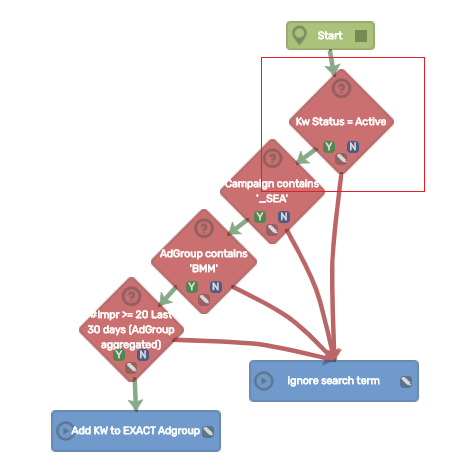
- Campaign contains or Ad Group contains. Workflows will often look for a particular naming convention in the campaign or ad group name to exclude those that are not relevant. In the example below, this workflow is looking only at campaign names that contain '_SEA' (our naming convention to denote search campaigns) and ad group names that contain 'BMM' (our naming convention to denote an ad group that only contains broad match modified keywords).

- Status. Workflows will often be assessing only active keywords, ad groups, and/or campaigns. Hint: The status check waterfalls up the account structure tree, so if the workflow is checking for an active keyword, it is also making sure that the keyword sits in an active ad group and active campaign. The same is true for the ad group level.
- Test each step to understand what results are found with the logic. To do this, we'll create and attach an alert action to both the 'yes' and 'no' outcomes for the first step.
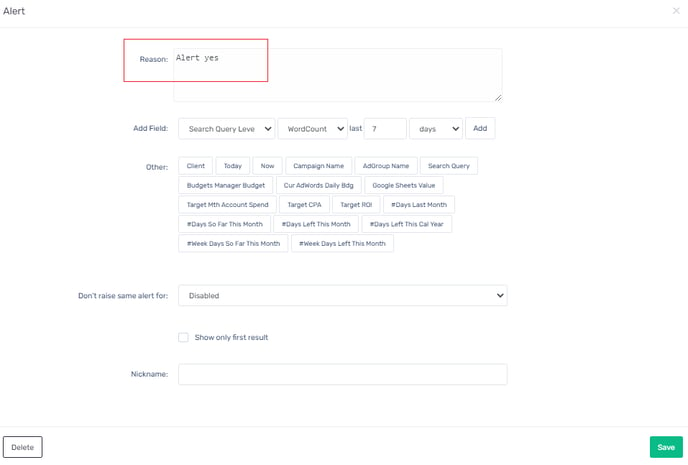
- From the Workflow Editing screen, click on 'Alert' under Actions.
- For the 'yes' alert, type 'Alert yes' in the Reason box and hit save.
- Attach the 'Y' line from the first step in the workflow to this newly created alert.
- Follow steps A through C again but include 'Alert no' in the Reason box and attach the 'N' line.
- Your workflow should now have 2 alerts attached to the first step, as per the example below.
BEFORE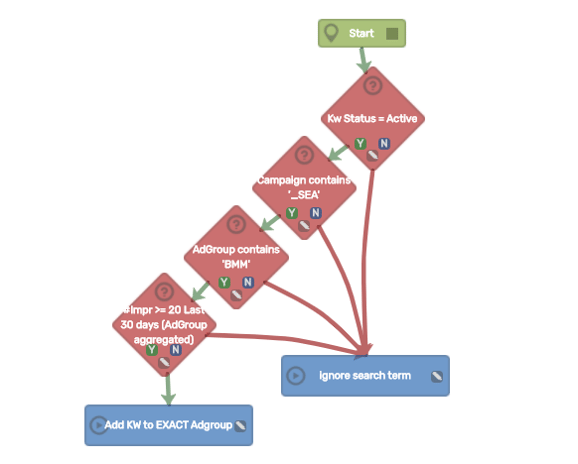
AFTER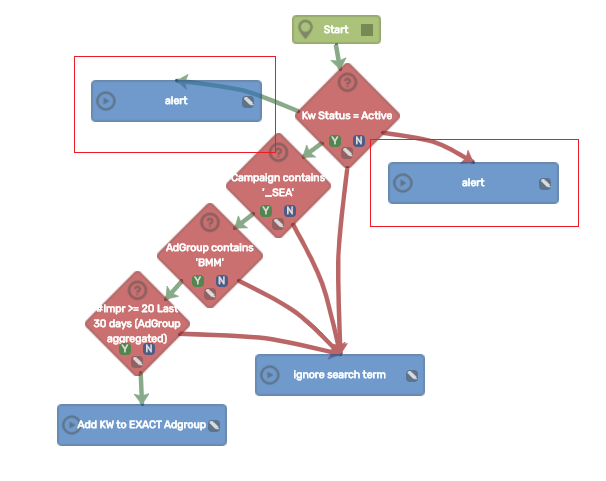
- Click on Test and then Preview.
- Note what the preview output includes and which alert (yes or no) is being shown. From there, you can determine whether this step of the workflow is providing the expected output and tweak that step as needed.
- If the first step is accurate, disconnect the yes and no alerts from step 1 by clicking on the green and red connection arrows and attach the alerts to the respective 'Y' and 'N' outcomes in the second workflow step.
- Click on Test and then Preview.
- Continue this process until you determine where the workflow results are not as expected and tweak the conditions from there.
- Once finished with testing, delete the yes and no alerts that were created for testing.